Thunderbird as email offline archive
It is a bit of a complex process to do it right. First we have to start off by converting your mailbox from the thunderbird default mbox directory to mail dir. This saves each message as an individual file and allows a cloud backup program (google drive, carbonite, onedrive, etc…) to back up the files one by one instead of having to back up the entire inbox again, which would be impractical as it is 15GB.
Start by closing thunderbirdTo do this, click start in the lower left and type or paste: “%appdata%\Thunderbird\Profiles”. There should be one random looking folder in there:

Right click that file, and copy it. Then switch back to your desktop, right click, and paste it (make sure you click “paste” and not “paste as shortcut!”). This will back it up in the event anything goes wrong in the conversion process.
Next we will start the conversion process.
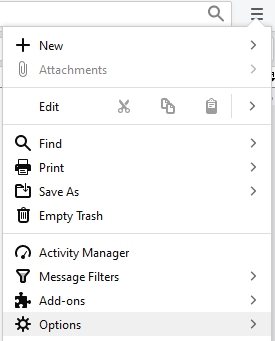
In the top right of thunderbird, click the three bars then click options then click options again:
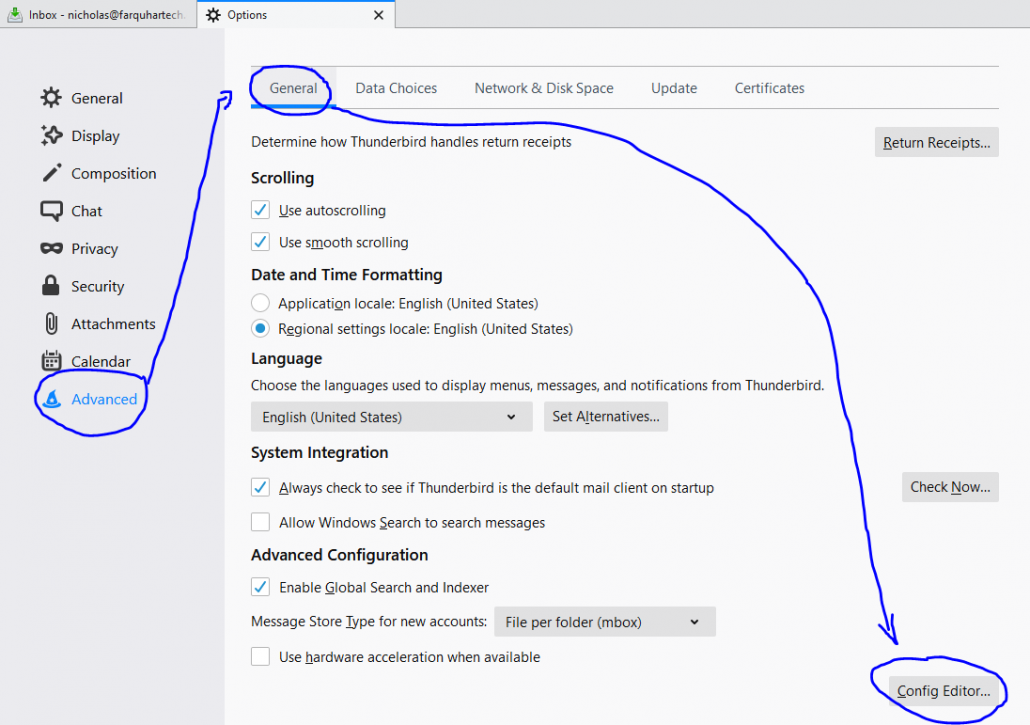
In options navigate on the left bar to “Advanced,” then in the top bar click “general,” finally, in the lower right click “config editor.”
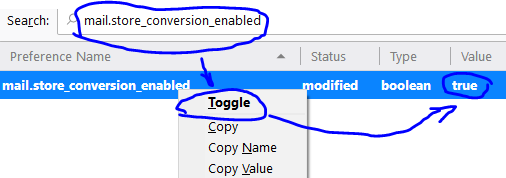
Accept the risk then in config editor, search for “mail.store_conversion_enabled” and toggle it to true:
Then click the X in the top right of the menu, and close out of the options tab on the top bar.
Converting the accounts.
This step will likely take a while to be sure you have plenty of time to allow the mailbox to convert. I would likely do this when you are done using email for the day.
Next we will convert the local folders from mbox to maildir. This is the part something is most likely to go wrong, so hopefully you backed up your profile like I mentioned before.
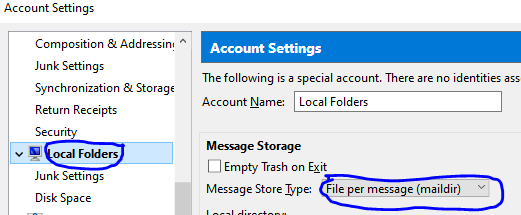
To start, right click “local folders” at the bottom of your inboxes on the left of thunderbird, and click “settings.” This will bring you to the menu seen below. Click “local folders,” Find the same dropdown labeled “Message Store Type” and convert it to “file per message (maildir).”
Beyond this it is all about filters and folders.
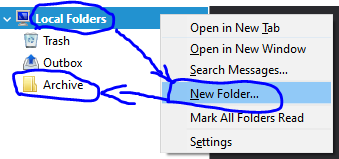
I would suggest you start by creating a folder under local folders called something like “archive” or “EMAIL ACCOUNT NAME HERE archive” if you plan to archive multiple emails. To do this right click “local folders” then click “new folder” and name it whatever you would like.
Next we move on to filters, which you can customize to you hearts content, but I will show you the important basics.
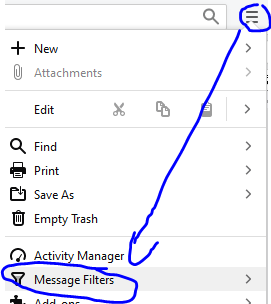
Open the filters menu by clicking the three bars in the top right, then “message filters”
Once there we must create a filter.
Highlighted in blue are requirements, start by makeing sure the correct account is selected in the “Filters for” dropdown. Then click “new.”
Next a filter box will appear, give the filter a name then ensure the action of “move message to” the archive folder you created is selected.
Highlighted in red is what you should customize to fit your own needs. In my case I selected “age in days is greater than 730.” Which means it will perform the archive action below after 730 days. In addition the checkbox above that labeled “Periodically, every 10 minutes” will automatically run the filter for you.
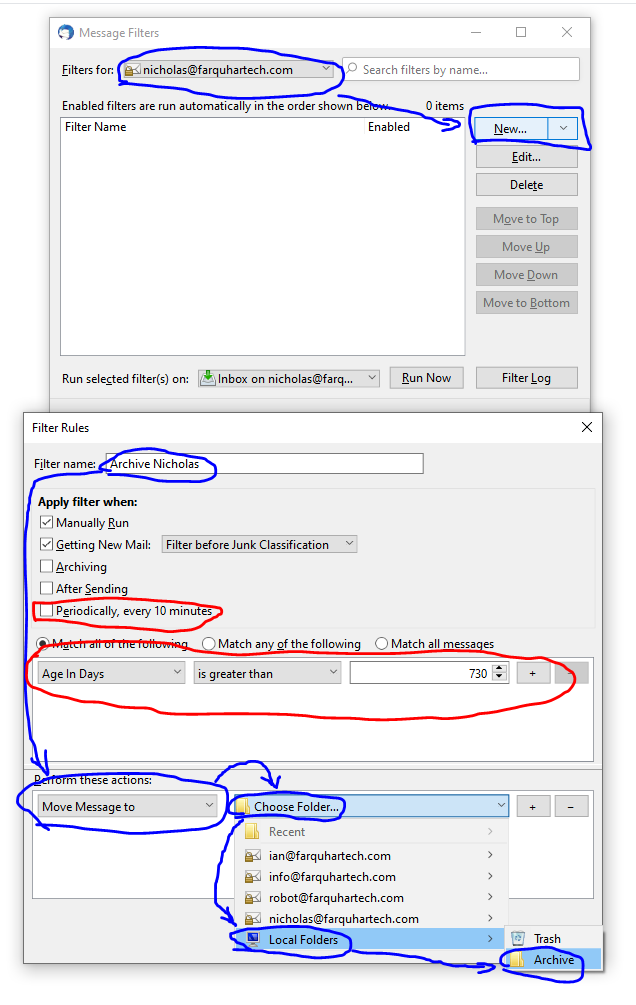
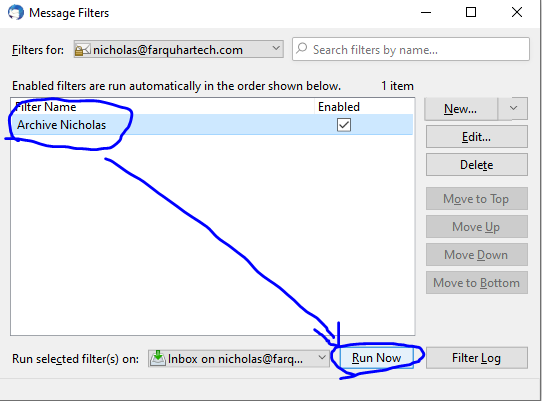
Click “OK” on the filter window and it will bring you back to the Message filters window. Here you can click the filter you created and click “run now”
Backing up to the cloud
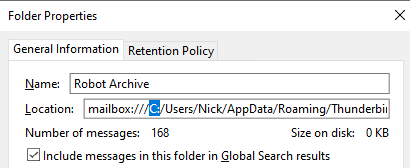
At this point those messages will be stored locally, you will likely want them to be backed up. The directory for the local messages is listed if you right click the folder you created in local folders and click “properties”
Then in the window that pops up, the directory is after the mailbox:/// in the “location” box. Starting with C: you can copy paste the rest into the file explorer navigation bar. If you back up that folder all messages stored locally will be safe with your cloud storage provider of choice.